Conker: Using AI to Create Quizzes

There are various ways artificial intelligence (AI) is being used in education, but did you ever think about using it to develop quizzes? I recently wrote about how you could use Chat GPT and Classkick to create accessible and self-grading quizzes; however, I recently came across an even better tool called Conker that can be used for generating quizzes.

What is Conker? 

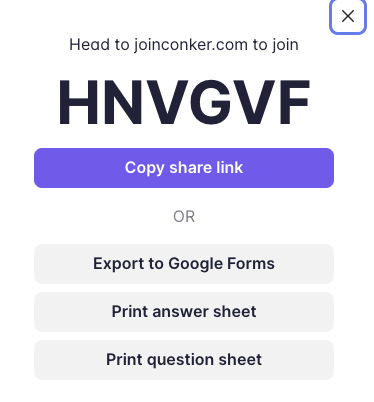
Conker uses AI to generate multiple-choice and fill-in-the-blank quizzes based on a topic and grade level. The self-grading quizzes can be accessed through a join code in Conker, exported to Google Forms, or as a printed copy.  There is even a text-to-speech option for students to listen to each question being read aloud, which is extremely helpful for students needing this accessibility feature. 


How Does It Work? 

First, create a free account and login to Conker. 

Next, you will tell Conker the topic (i.e. Capital Cities, Mitosis, etc.), the type of questions (i.e. multiple-choice or fill-in-the-blank), and how many questions (5 to 10 total).  There is even an option to choose which language you would like the test generated in, which can be helpful for ELL or multilingual students. 


Then, Conker will generate your quiz. Generating your quiz takes a few minutes. 

Finally, you can access your quiz in the Activity tab. This is where you can share, edit, duplicate, or delete your quiz! 


Students will receive a join code if you share your quiz through Conker, much like Kahoot, Quizziz, and other tools. 


Students will be prompted to enter their names and take the quiz. Once the quiz is finished, students can see their progress, which is a fantastic way for reducing test anxiety and helping students prepare for a summative assessment. In addition, teachers can see a report of student results once they complete their quiz. 


Making Accessible and Self-Grading Chat GPT Quizzes with Classkick

Being a teacher in today's classrooms might feel overwhelming, especially with the focus on Artificial Intelligence (AI) and Chat GPT over the past few months. If you are like me, you might be unsure how to integrate AI into your everyday tasks. The following blog post will show you how to generate a self-grading accessible quiz using Chat GPT and Classkick! 

Creating a Quiz with Chat GPT

There are a variety of different ways you could do create a quiz. You could ask Chat GPT to create a 10-question quiz on the US State Capitals. 

Want to make it more engaging? You could ask Chat GPT to create your quiz as a Blooket. 

Want your quiz on specific content from an article? No problem! Copy and paste the article into Chat GPT and ask it to create a quiz from the content. Copy and paste the quiz into a Word or Google Doc. 

Want to make your article more accessible? Have you ever considered combining Chat GPT with Classkick to create a self-grading quiz with audio recordings? Check out my video on how to create a self-grading and accessible quiz:


Conclusion


It may be a little scary using Chat GPT for generating quizzes; however, we can use tools like Classkick to create a self-grading and accessible assessment of what students know. As Chat GPT becomes more advanced, additional ways to generate quizzes will certainly exist. Obviously, multiple choice quizzes are not the end-all-solution; however, the key is to looking at possible barriers and envision how it could be redesigned to meet the needs of all students! 


Using Chat GPT to Write Learning Objectives

Do you like writing learning objectives? I can't say that it is one of my favorite tasks. For example, I had to put together a description and objectives for an upcoming presentation; however, my brain was fried. I was on a time crunch and could not assemble an intelligent set of objectives. What did I do instead? I pasted my description and asked Chat GPT to help me craft my objectives!

Here is my description: 

Do you clear ramps or shovel steps? Your answer may determine how accessible and equitable your classroom truly is. In the world of education, examples of step shoveling stifle student performance and create a one-size-fits-all approach to learning. The following session will help you develop a ramp-clearing or UDL mindset, which employs proactive design to create accessible learning experiences and environments for ALL. Participants will learn a variety of easy-to-implement strategies, resources, and tools for creating access and providing flexibility in the product or process.


I asked Chat GPT to put together my objectives and here is what it came up with: 

Objectives

  • Understand the importance of accessibility and equity in the classroom, and how it impacts student performance.

  • Develop a Universal Design for Learning (UDL) mindset and utilize proactive design principles to create accessible learning experiences and environments for all students.

  • Apply practical strategies, resources, and tools that promote accessibility and flexibility in education's product and process aspects, fostering inclusive learning environments.


Creating Sketchnotes with the Tayasui Sketches School App

Sketchnotes are a great way for students to take notes visually, but did you know you can use them as a formative assessment tool? Visually representing content is a great way to quickly assess students and provide them with options for learning. 


Sketches School

There are various tools to develop sketchnotes; however, Sketches School is one of my favorites on iOS and Android. It's easy to use and offers a variety of accessible options for students to use. I used Sketches School to develop this sample sketchnote to share my understanding of Universal Design for Learning (UDL). I was able to draw examples, words, add text, shapes, and images from my camera!

Want to see how it works? 

Check out my 4-minute tutorial video


Generate Interactive Lessons in Seconds with Curipod

Artificial intelligence (AI) has been one of the most noteworthy and polarizing topics in education in 2023. Although it seemed to come out of nowhere, AI has been an influential part of our daily life for quite some time. Many educators (including myself) find it scary to think about some of the challenges of AI; however, there are many time-saving benefits to teachers so that you can focus on what really matters - your students!


Lesson view of Curipod

Curipod

I recently came across Curipod, which uses AI to generate grade and subject-specific interactive lessons for students. For example, once I signed up for a free account, I chose to generate a 5th-grade lesson on fractions. Curipod designed an interactive lesson filled with open-ended questions, content about fractions, drawing activities, sample problems, and even a brain break! I could easily add or remove content, activities, and assignments if I wanted to modify any activities.

Curiopod reminds me of some of the features of NearPod and Kahoot combined, which makes learning engaging, fun, and student-centered. For instance, much like NearPod, students log in with a class code or QR code, enter their name, and the teacher controls how to navigate the presentation.
 
Dashboard view of Curipod


Curiopod provides students multiple response options for sharing their understanding, such as drawing and entering text. In addition, students can see each other’s work and “vote” for the best answer or drawing.

How Does It Work?

Want to see how it works? Check out my video tutorial.


Conclusion


In conclusion, the rise of artificial intelligence (AI) has profoundly impacted education in 2023. While AI may initially seem daunting, its benefits for teachers cannot be overlooked. By leveraging AI-powered tools like Curipod, teachers can save valuable time and energy on mundane educational tasks, allowing them to dedicate more attention to their students. Curipod's grade and subject-specific interactive lessons, reminiscent of NearPod and Kahoot, provide an engaging, student-centered learning experience. With features such as open-ended questions, drawing activities, sample problems, and the ability to modify content, Curiopod empowers students to actively participate, collaborate, and showcase their understanding.


Slides Timer: A Great Alternative to Embedding YouTube Video Timers in Google Slides

I always look for unique ways to keep students on-task, organized, and engaged. One helpful strategy I learned is embedding a timer in Google Slides. Sometimes, students must work on a task in pairs or individually, which creates the need for embedding a timer on specific slides. 


In the past, I have embedded YouTube videos; however, I recently came across a great Chrome Extension called Slides Timer that can create a personalized timer for your needs!

How Does It Work? 

Check out my video or read the instructions below: 


First, install the Chrome Extension in your Chrome Browser. 

Next, identify the slide that you want to add a timer to. Add the following text <<amount of time you want>>. For example, if I wanted a five-minute timer <<5:00>>

Finally, put your presentation in full-screen presentation mode. The timer will automatically work! 


Additional Features

Want to do more with your timer? Here are some powerful keyboard shortcuts and additional features! 

  • Use d key to pause timers. e key to reset timers. Timers will start pause with at the end.
  • <<5:00->> will count down starting at 5 minutes.
  • <<2:00+>> will count up starting at 2 minutes.
  • <<time>> will display the current time in AM/PM format.
  • <<date>> will display the date in 00/00/00 format.
  • <<date>> will display the date in shortened word format.
  • <<date>> will display the date in word format.
  • When using countdown trigger advancing to the previous slide with an extra - <<00:10-->> will move to the previous slide after 10 seconds.
  • When using countdown trigger advancing to the next slide by adding + <<00:10-+>> will move to the next slide after 10 seconds.
  • When using countdown trigger audio inserted on the slide by adding @ <<00:10-@>>.
  • When using countdown trigger video inserted on the slide by adding ! <<00:10-!>>.
  • <<time>> and <<date>> can be customized by adding | and formatting. <<date|MM/dd/yyyy>>


New Learn Lead Grow Home!

Hello readers! Happy New Year! It’s hard to believe that 15 years have passed since I launched my Learn Lead Grow blog. As we step into a n...