Chat Animator: An Excellent Formative Assessment Alternative

Chat Animator could be an excellent alternative for formative assessments because students can express their understanding through text messaging! When we provide options to recruit student interest, we generate engagement because students are connected to learning in meaningful and relevant ways. Most students use text messaging to connect with their friends and family daily, which makes Chat Animator easy to use and understand.

How Do I Use Chat Animator's Texting Story Maker? 

First, visit the Chat Animator website to create your texting story! 

Then, create your conversation! Chat Animator provides you with customized tools for creating a realistic conversation. Change the names of participants, upload profile pictures, and generate a text messaging conversation in the text boxes. 

Finally, you can record and save your animation as a video (.webm) or as a GIF. 

Scenario

Imagine that you have taught a lesson on the properties of triangles. Chat Animator could be used for students to share 3 things they learned about triangles' properties. Check out my sample conversation below! 

BONUS! Make the experience collaborative by having students download their conversation as a GIF and place it in a shared Google Slides presentation or PowerPoint. 


The Fill-in-the-Blank Definition Template

The Fill-in-the-Blank Definitions template is an excellent tool for scaffolding learning and helping multilingual students or all of your students learn new terms. 
The following template uses:

1. Google Docs
2. Dropdown feature in Google Docs

A drop down menu contains a word bank of terms that can be used to help construct the definition of the term. Additionally, students benefit from using visuals to make connections with new vocabulary. Students can insert images from Google or construct their own using Google AutoDraw! 


Check out my video tutorial or access my template here! 


5 Powerful Vocabulary Strategies for All Students

I was recently listening to a presentation about multilingual or ELL learners. The speaker talked about the progression of language development and the importance of vocabulary and student performance. Then they said something so simple yet profound. They said, "we are all language learners."

Sometimes, I need to remember that language is a progression, and we all have to learn new jargon and terminology anytime we learn something new. For instance, a high school biology student and a business education student must learn new vocabulary and jargon to progress through each course. The new teacher must learn the terminology and acronyms within the building. 

All learning begins with vocabulary, but how often do I emphasize vocabulary during instruction? When I try to universally design my classroom, I need to proactively look at learning barriers and honor the variability in my classroom. For instance, why do my students get confused and bored when I teach vocabulary? One reason is that I may not be honoring their background experiences or providing them with tools for making connections. 

Here are five strategies and templates for connecting a student's background knowledge and vocabulary development. 

Idea # 1: Word Stacking

I recently saw an infographic from ImpactPlus Whales that described 4 vocabulary strategies for developing schema. Word Stacking was of my favorite strategies because it could be used with or without technology. 

Students begin with a starter word or term. Then they "stack" similar words on top to form the highest stack. The group with the highest stack wins. 

If I were to use this strategy in my classroom, I might offer two different ways for students to participate in this activity. I would offer a low-tech option with post-it notes and perhaps a high-tech option with a tool like Jamboard or Padlet

Here's an example of a Jamboard template I made: 


Would you like the template? Click here!


Idea # 2: Frayer Model 

The Frayer model is one of my favorite tools for building student vocabulary because it provides students multiple ways to represent a term. There are many different variations of the Frayer model; however, I created the following variation to provide students with an opportunity to write, draw, and supply background knowledge. Plus, students can draw their own Frayer model on paper or use an electronic version.


Want the Jamboard template? Click here!


Idea # 3: Find a Route


ImpactPlus Whales shared another great strategy called Find a Route! I love it because of the higher order thinking skills it requires students to exercise. Students see a starting word and an ending word that you supply. They must provide two words in the middle of the sequence that make a logical connection between the first and last word. 

This is a great activity that can be done on paper, a dry erase board, or tool like Google Slides or Classkick. Check out my example below in Google Slides: 


Want the Google Slides template? Click here


Idea # 4: Vocabulary Choice Board


Choice boards are effective tools for creating student engagement. The following Vocabulary Choice Board was developed in Google Slides to provide students with options for demonstrating their understanding. As students complete each task, they will drag the red "X" on top of the task completed. There is an additional slide they can see and mark off vocabulary terms used. 


Want the Google Slides Template? Click here!


Idea # 5: Sketch and Tell Eduprotocol 

The Sketch and Tell strategy developed by Eduprotocols is a great way for students to make connections with vocabulary. Sketching and telling can be used on any device and with almost any application

I developed the following template in Jamboard for students to use different methods to define vocabulary. The bumper sticker template contains two different tasks. First, students need to create a bumper sticker containing the vocabulary term, slogan, and an image or illustration of their term. Much like a Frayer model, this provides students with different ways of sharing the meaning of the word. 

Secondly, the "Tell Us..." section provides students with an opportunity to briefly explain why they chose to do what they did. Reflection is an important aspect of learning because it helps us make deeper connections with learning. 


Want the Jamboard Template? Click here! 


Yippity: Master Study Skills with AI

Studying is such an important skill for students to master; however, many of our students struggle with basic study skills. Why is this? Learners may vary in their executive functioning skills, which help set goals, manage information, and utilize strategies to reach and master goals. 

Our students sometimes need additional tools and resources to help them master study skills. If you do a quick Google Search, you will find tons of resources, tools, and strategies. I want to share with you a tool that I recently came across called Yippity. 

What is Yippity? 

Yippity is a free website that uses Artificial Intelligence (AI) to create a list of questions and answers from a website or notes pasted from a document to help you study! 

Check out this video below or read the text below. 


How Does It Work? 

Step 1: Copy and paste your URL or notes to Yippity. 


Step 2: Click Generate and Yippity will develop a list of questions to study from! 


Step 3: Study time! 

Yippity develops a list of questions to study from called a quiz. You can save this quiz or share the URL with another person. 

Additionally, there are a variety fo features to hide, edit, copy, or delete questions. 


3 Hacks for Creating an Amazing Jamboard Template

I was recently presenting at a webinar when a participant shared with me their frustrations with Jamboard. One of their biggest frustrations was that students can delete the activities they worked so hard to create. I suggested the following hack for making a Jamboard template and bonus interactive activity!

I shared one of my favorite Jamboard templates of all time! The Mood Meter! Click here to make your own copy. 


How Did I Do It? 

Check out the video or text below to learn 3 hacks for creating your own Jamboard template. 


Hack # 1: Create a Jamboard Slide Template in Google Slides

First, make sure that you create a custom page setup of 1920 x 1080. Then, design your Google Slide as you wish your Jamboard background to look like. Finally, download your slide as a JPG or PNG. 


Hack # 2: Set Your New Background

After downloading your Google Slide as a PNG or JPG, you can open up a new Jamboard and upload your new background. 


BONUS Hack # 3: Add Shapes to Make it Interactive

In the example from above, I had students drag and drop stars into a quadrant that best describes how they feel. I used a Google Slide extension (formerly called Add-On) called Insert Icons to copy and paste stars into my Jamboard. 


Random Thoughts on UDL Lessons

The following video will share:

1. The Four Components of a UDL Lesson


2. Standards-Based Choice Boards (Great Gatsby Example)

3. Flexibility in the Product or Process

4. Single Point Rubrics

5. Adding Scaffolds and Supports

6. Force a Copy of a Google Doc and create a Template Preview

7. Google Smart Chips


Watch the video below!


Polypad by Mathigon is a Game-Changer in any Classroom!

Mathigon is indeed a "mathematical playground" for students and teachers alike! 

If you are not familiar with this amazing tool, it contains a variety of free tools, courses, and manipulatives to make learning math engaging and accessible. Whether you are in an online, hybrid, or face-to-face learning environment, there are tools for you to use! 

Polypad

Mathigon's Polypad is one of my favorite tools because it provides manipulatives and visuals for students to understand fractions, numbers, geometric shapes, algebraic equations, and more! Brain research tells us that students need multiple exposures and mediums to understand concepts and topics.


How Does it Work? 

Want to see it in action? Check out my three-minute video to see how it works! 


Develop Mastery with The Math Learning Center Apps

I recently talked with a math teacher, who told me how important mathematics is to develop cognitive and critical thinking skills. It makes sense because both are extremely important for mastering the skills necessary to solve problems. 

The foundation of math curriculum is often based on method standards, which show if a student has mastered a particular skill. If students fail to master one skill, it could lead to problems down the road as complexity tends to increase. 

The Math Center

Building background knowledge is an important strategy for scaffolding learning and helping students master content or skills. This can be accomplished by exposing students to multiple representations and examples. For instance, if you were teaching the value of money to a group of students, you may use manipulatives, video clips, and simulations.

However, what if your students struggled with understanding the connection between the coin and its actual value? The Math Center has an excellent web application or iOS app called Money Pieces. The application combines coins with base-ten blocks to help students connect money and its numerical value. 


The Math Center is filled with virtual simulations and manipulatives, which can help students master important skills and concepts. Here are some of my favorite tools: 


Fractions

Equivalent fractions can be difficult for some of our students to understand. The Fractions application by The Math Center is a great tool for helping students master this concept! 


Geoboard

Geoboard is one of my favorites because you can stretch "virtual" rubberbands around "pegs" to form line segments and polygons.  The best part is that students can share their virtual creations through a link or by downloading an image! 


Many More! 

There are many more examples that you can find and use with students, such as: 

  • Math Vocab
  • Number Lines
  • Number Frames
  • Pattern Shapes
  • Number Pieces (aka base-ten blocks)


Conclusion 

Many of our students struggle with problem-solving and mastery when a one-size-fits-all approach to instruction occurs. How can we help students develop as expert learners? In her book UDL Now 3.0, Katie Novak suggests using the UDL framework to build important background knowledge, utilize models and rubrics, and provide students with "mastery-oriented feedback." The Math Learning Center might be a great tool in your toolbox to accomplish this! 


Develop Important Student Thinking Skills with the Thinking Routine Toolbox

 How do you infuse critical thinking and decision-making into your classroom? Critical thinking is an important part of the learning process and developing important cognition skills; however, if you are like me, you tend to run out of strategies that students can use to model the thinking process. 

I recently came across Project Zero's Thinking Routine Toolbox, which is filled with scaffolded thinking routines aimed at developing thinking skills within students. Interested in trying a routine out? Project Zero's website contains ten categories, such as core thinking routines, possibilities and analogies, introducing and exploring new ideas, and more. 


For example, I often introduce new ideas and concepts to students. Don't get me wrong, the KWL charts that I often use are great; however, there are times when I want to try something out of the ordinary! I recently came across a thinking routine called Compass Points.

Students are asked four questions corresponding to the points on a compass (N, S, E, W).

  • What excites you? 
  • What worries you?
  • What do you need to know?
  • What is a stance or suggestion for moving forward?


This is a great protocol for student reflection, discussion, or both. 

In conclusion, whether you are a techie or non-techie person, Project Zero's thinking routines can help stimulate discussion, develop critical thinking skills, and increase learner engagement. You can very easily adapt any of the following routines to many of the technologies that you are already using! 

Give it a try and let me know what you think! 


Crash Course on Using Mentimeter to Engage Students

 There are so many cool educational technology tools to choose from! Mentimeter is quickly becoming one of my favorites because I can quickly engage large audiences with various free tools and features, such as quizzes, word cloud generators, rating scales, etc.


If you are just learning Mentimeter, the free version will give you all of the bells and whistles you need to create a great presentation! When you are ready to take it a step further, there are various paid options to choose from. 


The following video will show you how to use the free version of Mentimeter! 


Quickly Summarize and Increase Accessibility with Smmry and Lexend

Reading comprehension can be difficult for students of all ages. Smmry is a tool that can be used to support students who may need a simplified summary to support their learning. It can also be used to make the research process more efficient. 

How Does It Work? 

Smmry reduces the text to the most important sentences by looking for keywords and phrases, then removing unnecessary transition phrases, clauses, and examples. How does it work? 

First, install the Bookmark widget on Chrome or visit the Smmry website.

Next, paste your content in the text box, upload a file, or paste the URL of an article into Smmry. You can choose how many sentences you would like to summarize the text. Smmry uses 7 sentences by default; however, you can change this number. 


Finally, choose "Summary" when you are ready, and Smmry will automatically summarize your article. 


BONUS IDEA

I love how I can use Smmry to provide students with additional support for reading a text. I like to provide students with access to the main article and an audio version of the article; however, there are some things I could do to make this even more accessible to my students. 

First, I could copy and paste the text into a Google Doc. Then I could change the font to Lexend Font, which is a great font for reducing barriers and increasing access to the text. 

Next, I could add hyperlinks to key words and terms that students may or may not understand. 

Finally, I could add a YouTube video to provide a visual example for students who may struggle with understanding the background and context of World War 2. Did you know that you can paste a YouTube link and press tab to automatically create a Smart Chip? This is a great way of helping students identify your video link. 


Map Skills Made Easy with MapPuzzle

Cartography, or the ability to identify specific states, countries, and regions on a map, is an important part of learning; however, many of our students struggle with this important skill. There are a variety of reasons for this. One of the most common learning barriers is that student differ in how they comprehend and perceive information. In other words, they need options for representing material in a way that works best for them.

Remember When You Were In School? 

How did you learn to identify the location of specific states and countries on a map when you were in school? If you were like me, your teacher probably handed out a worksheet and colored pencils and asked you annotate and color each land portion. 

This one-size-fits-all solution may have worked for my classmates, but I struggled with this particular strategy. For some reason, it did not "click" like my teacher had anticipated. I prefer more hands-on learning opportunities; however, that was not part of the curriculum. 

MapPuzzle

I recently came across a simple tool called MapPuzzle, which would have been a helpful tool for learning about the different states and countries we discussed in history class. This drag-and-drop tool provides a digital option for students to master their cartography skills inside and outside of class. 

Why do I like this tool? 

  • MapPuzzle is accessible to students of all abilities. What if a student cannot access paper and pencil? MapPuzzle provides an electronic option without having to recreate the wheel. Its drag-and-drop interface makes it easy to use on tablets, Chromebooks, laptops, and other devices. 


  • It provides scaffolds and supports to help aid students with identifying specific regions. For example, each state, province, or country is listed and contains a corresponding shape to help students identify the land portion. This visual prompt may be helpful for some students, while others may not need it at all. 
  • MapPuzzle has different maps students can use to learn about the world around them. 


  • It takes a gamified approach to learning! MapPuzzle keeps track of the amount of time it takes for a student to solve a puzzle, which is a great tangible way of measuring growth and progress.  

Conclusion

Providing Multiple Means of Representation is an essential part of creating an accessible learning experience, as we help students understand "what" something is. The more options we can provide students with using different mediums and resources, the more successful we can help them be! 


Use Tiny Wow to Convert and Customize PDF's, Images, and Videos

Tiny Wow is a free website you can use to quickly convert and customize files, images, and videos into the formats you need. 

For instance, PDF's are a very common file type in education because they provide a convenient format that is accessible on multiple devices and screen readers. However, educators often find themselves frustrated trying to customize PDFs to their needs. 


Tiny Wow provides you with tools for quickly creating, editing, and manipulating PDF files to meet your students' needs!

Have you ever tried to share a JPEG image; however, it appears in HEIC format instead? You can use Tiny Wow to change the format of your picture! Videos can be converted as well!

How Does It Work? 

Tiny Wow is free and simple!

1. Upload your file to Tiny Wow and choose your format

2. Tiny Wow will convert your file into the correct format

3. Download your file! 


Two Google Docs Tricks for Providing Students with Templates and Graphic Organizers

If you are like me, you want to provide your students with the best tools, templates, and resources for completing assignments. I often attach these resources to Google Classroom; however, this can become very cumbersome if I have more than three links. 

One strategy I found helpful is embedding templates and graphic organizers into my instructions in Google Docs. Instead of having students make their own copies, I have used the following tricks to "force a copy" or show a "preview" of the template. Then students can choose to use or not use the templates without remembering to visit File > Make a Copy. 

How to Force a Copy or Create a Template Preview

How does it work? Check out my video


The Key to Choice? Offer Flexibility in the Product or Process

Teachers often ask me, "How can I infuse autonomy and choice into learning?" It's a great question; the key is understanding the power of choice. Choice is a powerful tool in creating learner engagement; however, the type of choice matters greatly. 

It's NOT the Choice, But the Type of Choice That Matters

Katz and Assor (2006) stated that it's not the choice but the type of choice that matters. They argued there are three essential elements of choice: 

  • Autonomy - Do students understand the relevance and meaning of the task?
  • Competence - Are students appropriately challenged, and can they master the task?
  • Connectedness - Do students feel a sense of belonging and accomplishment?

We, as teachers, sometimes struggle with providing our students with choices. There have been times when I have felt guilty and had to give myself permission to give students choice. There have been other times when I was frustrated by the lack of flexibility I thought I had. 

We Have a Choice

When you think about it, we all have a choice in everything we do. For example, I was watching an episode of COPS the other night. A police officer arrived at the scene of a domestic dispute between a husband and wife. The officer decided that it was best if the couple separated for the evening and asked the husband if he was willing to leave for the evening. 

I was taken aback when the husband replied, "no." Without a second thought, the officer replied, "that's your right." In other words, we have a choice in almost everything we do. In this particular situation, the man did not take the officer's advice. 

I know it might sound silly, but it provided me with a moment of clarity. We all have choices in everything we do. We can choose to obey or disobey the speed limit. We can choose to eat healthy or unhealthy. We can choose to show up to work or call off. 

Flexibility in the Product of Process 

What about providing autonomy and choice in the classroom? How can we provide students with choice? I believe there are two different ways to provide students with a choice: we can provide students with flexibility in the product or process of learning. 


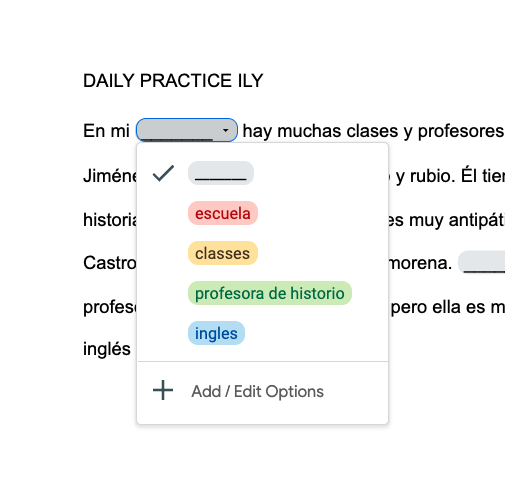
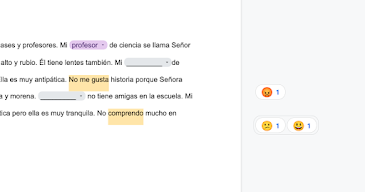
Flexibility in the Product
is one of the most common strategies for offering students choice. In other words, students may have flexible options for what is learned, produced, or assessed. For example, what if your learning goal was to have students demonstrate their understanding of the causes of the American Revolutionary War? You may provide students with several structured options for demonstrating their knowledge, such as creating an essay, slideshow, video, or podcast. 

Flexibility in the Process is a helpful strategy when you feel that you don't have much choice. In other words, students may have flexible options for how something is learned or produced. For example, let's say you don't have much flexibility for an essay assignment. Your learning goal states that all students will construct an essay on the causes of the American Revolutionary War. 

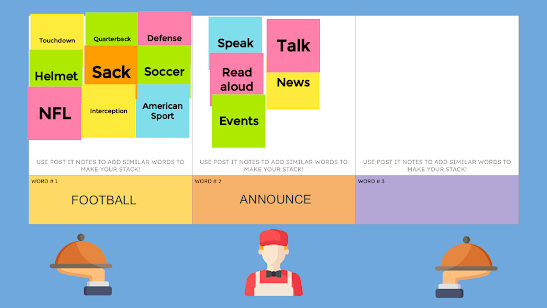
How can you provide students with a choice? You might give students options for brainstorming, such as using post-it notes or a graphic organizer. You might give students options for how they construct their first draft, such as using Google Docs, the voice typing feature in Google Docs, or writing the essay by hand. You might provide students with options for editing their draft, such as Grammarly, using a peer, or using a checklist. 

Conclusion

Choice is a powerful strategy for increasing student engagement; however, it can be overwhelming to do. We might be pressured by deadlines, goals, standardized testing, and curriculum pacing. We might be limited on time, ideas, or resources. However, I encourage you to look for one lesson where you can infuse choice and see the possibilities! 
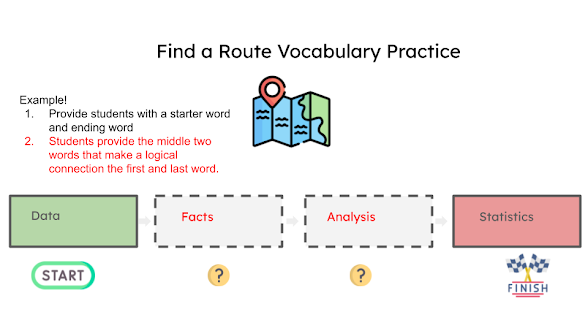


Creating Engaging Google Docs Activities with Dropdown Menus and Emoji Reactions

Have you seen some of the new features in Google Docs lately? I have seen a lot of ideas swirling around on social media about using the Dropdown menu and Emoji Reactions features on Google Docs. One of my favorites is a Cloze Reading activity by Eric Curts. If you haven't seen this, you should totally check it out! 

If you are not familiar with these features, here is a brief overview. 

  • The Dropdown feature is a great way of providing students with scaffolds and support for correct terms, numbers, symbols, etc. I decided to take the plunge and see how this could be applied in the foreign language (or any) classroom. Here is an example of this in action: 

  • The Emoji Reactions feature is a great way for checking for understanding! Emojis could be used to demonstrate understanding of a term, analyze the emotional state of a character, or summarize a paragraph. The best part is that this feature has a collaborative component. In other words, you could ask students to work in groups and have each member add their own Emoji reaction to


I thought about how I could combine both of these features into an engaging and rigorous activity for a colleague's Spanish class.  Check out my video below for how I did it: 


Matt Bergman (2022)


Amazing Google Lens Trick! Copy Printed Text with Your Phone and Paste in Google Docs on Another Device

Did you know that you can use the Google Search App on your phone to scan, copy, and even translate a printed text on another device? You can literally scan a printed text from your phone and send it to your laptop with a few taps. This is a game-changer if you want to Universally Design your classroom and make printed text more accessible to ALL students!  

Printed Text Limitations

We know that learners differ in how they interact and perceive different media and printed text does have several limitations. First, you are limited in how you can manipulate and interact with printed text. For instance, you cannot change the font size or style. Secondly, hyperlinks to additional resources and tools cannot be embedded in printed documents. Finally, printed text does not have built-in speech-to-text tools. 


Educators are sometimes limited by budgets and resources, creating barriers to creating accessible learning environments. This simple trick is free and how students learn in your classroom! 

How Does It Work? 


Here is a brief tutorial on copying text, pasting it into Google Docs, and changing the font to Lexend.


Extreme Makeover UDL Edition! Making a Self-Pace Google Slides Activity Accessible and Even Better!

I recently saw an awesome self-paced activity using Google Slides by the Sprinktop Teacher! It was engaging and well designed. As someone constantly thinking about the importance of design and accessibility, I thought..."how could I make this amazing activity even more amazing and accessible for ALL students?" 

UDL Makeover: Making An Amazing Activity Even More Amazing and Accessible 

Check out my video below to learn:

1. How to create your own self-directed slides in Google Slides

2. How to make your activity accessible

  • Making your fonts more accessible with Lexend
  • Publishing your presentation and providing a QR-code generated from Chrome


 Conclusion

When we identify high-probability barriers to accessing learning activities and design with accessible options in mind, we can create highly engaging learning activities for all students. Check out more about the UDL framework and Matt's Lesson Planning with a POP framework below:


Making Reading Accessible Through Lexend

Researchers have found that reading fluency is one of the factors that distinguishes good readers from poor readers; however, many of our students and even adults struggle with reading throughout their careers. In fact, according to the US Department of Education, over 70% of the population struggles with some form of reading difficulty. 

What if the problem was more than fluency and literacy? 

In 2001, Dr. Bonnie Shaver-Troup discovered and designed a new font called Lexend to reduce visual stress and improve reading performance for struggling readers and those with dyslexia.


Shaver-Troup found that the Lexend not only makes reading more for struggling readers and those with dyslexia, it actually benefits ALL readers. Researchers have found some powerful evidence for Lexend:

  • Reading fluency is calculated to find the correct number of words spoken per minute. Researchers discovered that 90% of readers had better fluency scores with Lexend font than Times New Roman. 
  • Reading fluency performance improved by 19.8% for readers using Lexend versus Times New Roman

Lexend is an example of how design is an important aspect of teaching and learning. We can make reading assignments more accessible for our students by changing the font!

How Can I Use Lexend in Chrome and G Suite?  

Check out the following website for Lexend to find out more information. 

If you would like to add Lexend to Google Chrome, I recommend checking out the following Chrome Extensions HelperBird and ReaderMode

Adding Lexend to G Suite (Docs, Slides, Sheets, etc.) is very easy! Check out the following video on how to do it: 


9 Ways to Make Your Presentations More Accessible to Students

Presentations are an important part of the teaching and learning process. There are times when instruction must occur in small or large groups; however, are your presentations accessible to all of your students? 

Variability is the rule and not the exception in our classrooms. When you have so many learner differences in one learning environment, you are bound to have learning barriers emerge. How can we make presentations more accessible to students? 


As a reminder! There are so many different ways to make your presentations more accessible to students! 

  • Guided notes and a “live” note-taker on a document camera / Google Doc. Take a picture of physical notes and post it to Google Classroom. 
  • Use the Closed Captioning feature in Slides
  • Post materials to Google Classroom
  • Periodic pauses for reflection
  • Q&A feature in Slides for live questions
  • Pear Deck or NearPod to make the presentation interactive
  • Share a published copy of the presentation with interactive links and embedded audio from MOTE
  • Add video from YouTube or Google Drive


Take Your Instruction to the Next Level with YoTeach!

 Have you ever considered using a chatroom in your classroom? I know it sounds intimidating because chatrooms and backchannel chats have had a reputation for misuse. However, YoTeach! is a teacher and student-friendly website that may change your mind.


Why YoTeach!? 

YoTeach! has so many great features like: 

  • Password-protected administrative controls to filter for profanity and moderate conversations before they are posted
  • Chat and voting mode
  • Spaceboard - a collaborative whiteboard for students and teachers to use! 
  • Drawboard - an individual board to draw, brainstorm, and add ideas
  • Hand raising feature for students!
  • Math doodle board which converts your handwritten content into digital equations! 

How might you use this in your classroom? 

Take your instruction to the next level and provide students with opportunities to connect, ask questions, and understand instruction in different ways. Here are just a few ideas!
  • Provide students with a space to ask questions during instruction
  • Collaborative space for group work
  • Facilitate ongoing instruction
  • Virtual instruction 

How does it work? 

Check out my video below:


Accommodations for ALL Learners is the Most Amazing Website!

Learners are highly variable in the way they learn and interact within learning environments. Unfortunately, not all learning environments and lessons work for our students because many are designed to provide a one-size-fits-all approach to learning. When we teach toward an "average student" (which doesn't exist), we can unintentionally create barriers in the learning environment and learning process. 

The Universal Design for Learning (UDL) framework is a research-based method of designing accessible lessons and learning environments for all students. Although students are highly variable, all students need flexible options for: 

  • Representing content
  • Demonstrating understanding (Action & Expression)
  • Engagement  

Creating access begins with effective design and accessible tools. I recently came across an AMAZING website called Accommodations for All Learners that is dedicated to sharing tools and resources to make learning accessible for all learners. 


The website is filled with amazing resources and ideas for designing accessible learning experiences through technology. Here are some of my favorites!

  • The graphic organizer section is filled with ready-to-use graphic organizers for learning! 

You Can Get with This or Get with That: Infusing This or That Choice Boards in the Classroom

Offering choice is an excellent way of creating engagement in the classroom. Simply providing choice is not enough. According to Katz and Assor (2006), the types of choices we offer students are critical. I like to say, "it's not the choice, but the type of choice that matters." 

Effective choice should offer (Katz & Assor, 2006):

  • Autonomy - Do students have opportunities for choice, evaluation, and decision-making? 
  • Competence - Do students have an appropriate amount balance of rigor, relevance, and mastery? 
  • Connectedness - Do students feel a sense of belonging and accomplishment?

Choice shouldn't be a free frawl because too much choice can be paralyzing. The key is offering structured-choice that provides opportunities for students to exercise autonomy, competence, and connectedness. Research suggests that our brains are wired to handle between 2 and 9 choices. In other words, 2 - 9 options are the "sweet spot." 


This or That Choice Board

One of my favorite tools for offering structured choice is the This or That Choice Board. Here is a sample Math This or That Choice Board that I created in Google Docs. 

The idea is for students to complete four tasks or one in each column. Each column is aligned to a specific skill, concept, or standard. Students have two different ways to demonstrate mastery.  

Would you like your own template? Click HERE! 

What If I Don't Have Flexibility? 

If you are like many teachers, a This or That Choice board can be the perfect solution for classrooms that don't have a lot of flexibility. For instance, you may not have much flexibility with the content, as students may have to solve multi-digit addition and subtraction problems. However, you could provide students with the autonomy to choose one problem or the other.


Another variation to this example is having a problem for students to solve in the first row and an opportunity to create their own word problem on the bottom row. In this example, I provide the answer to a word problem, but students have to develop a solution that makes sense. 


This or That Choice Boards are also beneficial for providing students flexibility in the process of learning a new concept. Take, for instance, the following This or That Choice Board on Volume. Students will go through the board to meet the academic standard in their own way. 


Conclusion

Remember, it is not the choice but the type of choice that matters most in the classroom. Effective choice provides students with opportunities to exercise autonomy, connectedness, and competence. Although choice is important, staying in the "sweet spot" of 2 to 9 choices is important, making a This or That Choice Boards extremely helpful! 


Connectedness - Do students feel a sense of belonging and accomplishment?

UDL Lesson Makeover: 1893 World's Fair Project

One of the most exciting aspects of my job is to help other educators find solutions to make learning accessible to all students. For instance, I once worked with a group of teachers, who had a really cool project, but it needed some accessible options. Teachers wanted students to understand how the 1893 World's Fair inspired Milton Hershey to solve problems and innovate the confectionery industry. Teachers wanted students to create an invention and analyze it to achieve this goal. 


How could we design a lesson that was accessible and provide all students with an equal opportunity to be successful?  

Planning My Lesson with a POP

Planning with accessible lessons that address learner variability begins with a POP. 

I use this acronym to:

  • Predict high probability barriers in the methods, materials, and assessments that I am using
  • Overcome barriers with accessible options for how content is represented, how knowledge is expressed, and how students engage in learning (aka UDL Framework). 
  • Plan my lesson with a clear goal and flexible means of achieving it. 

Want to see how it works? Read on and watch my video below to learn more:

Predict High-Probability Barriers 

It's a great idea; however, several high-probability barriers emerged with the goals, methods, materials, and assessments, such as:
  • This is a one-size-fits-all worksheet. What about students who need bigger text and text-to-speech tools? 
  • What is an invention? 
  • Why should students know this?
  • What is the 1893 World's Fair? How does it relate to this project?
  • Why do students need to create an invention? What's the purpose? 
  • What is expected of students? How do they present their findings? 
  • How do they create their invention? 
Obviously, there are more barriers we could list, but you get the point. 

Overcome with Accessible Options

Next, it is essential to look at how we could address high-probability barriers with options. It is true "the way that we learn is as different as our DNA or fingerprint" (CAST). However, how do we address this variability that exists? There are three different principles based on brain research through the UDL framework. I paraphrase them below:
  • Provide options for representing content
  • Provide options for expressing knowledge
  • Provide options for engagement
In the following example, we designed a learning menu, a form of a choice board. It provided students with opportunities to learn about the 1893 World's Fair, analyze an actual invention, create their own invention to solve a problem, and describe how the invention works and solves a problem. Here's the actual project we developed


Plan My Lesson

Finally, it is time to begin planning the lesson. There are a variety of planning tools out there; however, I created the following UDL lesson planning template to help guide my journey. 


In my video, I had mentioned finding a picture or video of a little-known invention and asking students for their input on what exactly it is and does. Then talk about the importance of inventions and introduce our project. 

It may also be helpful to have students develop a learning goal for the day before they get started. As students are working on their project, it provides you with opportunities to connect with students and provide one-on-one or small group instruction. During the last five minutes of class, have students self-evaluate their progress and set goals for the following day. 

Conclusion 

Although there are many different ways this project could have been completed, it is crucial to plan with accessibility in mind so that ALL students can have the opportunity to learn. Planning with a POP is one way that I find helpful for designing lessons that work for students regardless of ability or disability. 


10 Tips for Building Better Learning Goals

Goals are not just the foundation; they are the roadmap for effectively planning a UDL lesson. They often serve as a roadmap, providing stud...