9 Ways to Make Your Presentations More Accessible to Students

Presentations are an important part of the teaching and learning process. There are times when instruction must occur in small or large groups; however, are your presentations accessible to all of your students? 

Variability is the rule and not the exception in our classrooms. When you have so many learner differences in one learning environment, you are bound to have learning barriers emerge. How can we make presentations more accessible to students? 


As a reminder! There are so many different ways to make your presentations more accessible to students! 

  • Guided notes and a “live” note-taker on a document camera / Google Doc. Take a picture of physical notes and post it to Google Classroom. 
  • Use the Closed Captioning feature in Slides
  • Post materials to Google Classroom
  • Periodic pauses for reflection
  • Q&A feature in Slides for live questions
  • Pear Deck or NearPod to make the presentation interactive
  • Share a published copy of the presentation with interactive links and embedded audio from MOTE
  • Add video from YouTube or Google Drive


Take Your Instruction to the Next Level with YoTeach!

 Have you ever considered using a chatroom in your classroom? I know it sounds intimidating because chatrooms and backchannel chats have had a reputation for misuse. However, YoTeach! is a teacher and student-friendly website that may change your mind.


Why YoTeach!? 

YoTeach! has so many great features like: 

  • Password-protected administrative controls to filter for profanity and moderate conversations before they are posted
  • Chat and voting mode
  • Spaceboard - a collaborative whiteboard for students and teachers to use! 
  • Drawboard - an individual board to draw, brainstorm, and add ideas
  • Hand raising feature for students!
  • Math doodle board which converts your handwritten content into digital equations! 

How might you use this in your classroom? 

Take your instruction to the next level and provide students with opportunities to connect, ask questions, and understand instruction in different ways. Here are just a few ideas!
  • Provide students with a space to ask questions during instruction
  • Collaborative space for group work
  • Facilitate ongoing instruction
  • Virtual instruction 

How does it work? 

Check out my video below:


Accommodations for ALL Learners is the Most Amazing Website!

Learners are highly variable in the way they learn and interact within learning environments. Unfortunately, not all learning environments and lessons work for our students because many are designed to provide a one-size-fits-all approach to learning. When we teach toward an "average student" (which doesn't exist), we can unintentionally create barriers in the learning environment and learning process. 

The Universal Design for Learning (UDL) framework is a research-based method of designing accessible lessons and learning environments for all students. Although students are highly variable, all students need flexible options for: 

  • Representing content
  • Demonstrating understanding (Action & Expression)
  • Engagement  

Creating access begins with effective design and accessible tools. I recently came across an AMAZING website called Accommodations for All Learners that is dedicated to sharing tools and resources to make learning accessible for all learners. 


The website is filled with amazing resources and ideas for designing accessible learning experiences through technology. Here are some of my favorites!

  • The graphic organizer section is filled with ready-to-use graphic organizers for learning! 

You Can Get with This or Get with That: Infusing This or That Choice Boards in the Classroom

Offering choice is an excellent way of creating engagement in the classroom. Simply providing choice is not enough. According to Katz and Assor (2006), the types of choices we offer students are critical. I like to say, "it's not the choice, but the type of choice that matters." 

Effective choice should offer (Katz & Assor, 2006):

  • Autonomy - Do students have opportunities for choice, evaluation, and decision-making? 
  • Competence - Do students have an appropriate amount balance of rigor, relevance, and mastery? 
  • Connectedness - Do students feel a sense of belonging and accomplishment?

Choice shouldn't be a free frawl because too much choice can be paralyzing. The key is offering structured-choice that provides opportunities for students to exercise autonomy, competence, and connectedness. Research suggests that our brains are wired to handle between 2 and 9 choices. In other words, 2 - 9 options are the "sweet spot." 


This or That Choice Board

One of my favorite tools for offering structured choice is the This or That Choice Board. Here is a sample Math This or That Choice Board that I created in Google Docs. 

The idea is for students to complete four tasks or one in each column. Each column is aligned to a specific skill, concept, or standard. Students have two different ways to demonstrate mastery.  

Would you like your own template? Click HERE! 

What If I Don't Have Flexibility? 

If you are like many teachers, a This or That Choice board can be the perfect solution for classrooms that don't have a lot of flexibility. For instance, you may not have much flexibility with the content, as students may have to solve multi-digit addition and subtraction problems. However, you could provide students with the autonomy to choose one problem or the other.


Another variation to this example is having a problem for students to solve in the first row and an opportunity to create their own word problem on the bottom row. In this example, I provide the answer to a word problem, but students have to develop a solution that makes sense. 


This or That Choice Boards are also beneficial for providing students flexibility in the process of learning a new concept. Take, for instance, the following This or That Choice Board on Volume. Students will go through the board to meet the academic standard in their own way. 


Conclusion

Remember, it is not the choice but the type of choice that matters most in the classroom. Effective choice provides students with opportunities to exercise autonomy, connectedness, and competence. Although choice is important, staying in the "sweet spot" of 2 to 9 choices is important, making a This or That Choice Boards extremely helpful! 


Connectedness - Do students feel a sense of belonging and accomplishment?

UDL Lesson Makeover: 1893 World's Fair Project

One of the most exciting aspects of my job is to help other educators find solutions to make learning accessible to all students. For instance, I once worked with a group of teachers, who had a really cool project, but it needed some accessible options. Teachers wanted students to understand how the 1893 World's Fair inspired Milton Hershey to solve problems and innovate the confectionery industry. Teachers wanted students to create an invention and analyze it to achieve this goal. 


How could we design a lesson that was accessible and provide all students with an equal opportunity to be successful?  

Planning My Lesson with a POP

Planning with accessible lessons that address learner variability begins with a POP. 

I use this acronym to:

  • Predict high probability barriers in the methods, materials, and assessments that I am using
  • Overcome barriers with accessible options for how content is represented, how knowledge is expressed, and how students engage in learning (aka UDL Framework). 
  • Plan my lesson with a clear goal and flexible means of achieving it. 

Want to see how it works? Read on and watch my video below to learn more:

Predict High-Probability Barriers 

It's a great idea; however, several high-probability barriers emerged with the goals, methods, materials, and assessments, such as:
  • This is a one-size-fits-all worksheet. What about students who need bigger text and text-to-speech tools? 
  • What is an invention? 
  • Why should students know this?
  • What is the 1893 World's Fair? How does it relate to this project?
  • Why do students need to create an invention? What's the purpose? 
  • What is expected of students? How do they present their findings? 
  • How do they create their invention? 
Obviously, there are more barriers we could list, but you get the point. 

Overcome with Accessible Options

Next, it is essential to look at how we could address high-probability barriers with options. It is true "the way that we learn is as different as our DNA or fingerprint" (CAST). However, how do we address this variability that exists? There are three different principles based on brain research through the UDL framework. I paraphrase them below:
  • Provide options for representing content
  • Provide options for expressing knowledge
  • Provide options for engagement
In the following example, we designed a learning menu, a form of a choice board. It provided students with opportunities to learn about the 1893 World's Fair, analyze an actual invention, create their own invention to solve a problem, and describe how the invention works and solves a problem. Here's the actual project we developed. 


Plan My Lesson

Finally, it is time to begin planning the lesson. There are a variety of planning tools out there; however, I created the following UDL lesson planning template to help guide my journey. 


In my video, I had mentioned finding a picture or video of a little-known invention and asking students for their input on what exactly it is and does. Then talk about the importance of inventions and introduce our project. 

It may also be helpful to have students develop a learning goal for the day before they get started. As students are working on their project, it provides you with opportunities to connect with students and provide one-on-one or small group instruction. During the last five minutes of class, have students self-evaluate their progress and set goals for the following day. 

Conclusion 

Although there are many different ways this project could have been completed, it is crucial to plan with accessibility in mind so that ALL students can have the opportunity to learn. Planning with a POP is one way that I find helpful for designing lessons that work for students regardless of ability or disability. 


The Four Must-Haves of Effective Choice Boards

Providing autonomy and choice is paramount to creating engagement in the classroom. Choice boards are one of the best tools for creating an engaging and student-centered classroom. 

Why Provide Choice? 

Research shows that providing students with choice increases engagement, leads to more profound and richer learning experiences, increases on-task behavior, has positive impacts on SEL, increases collaboration, and can even decrease negative stress-responses in the brain (Anderson, 2016; Denton, 2005; Willis, 2006). 


What are Choice Boards? 

A choice board is a graphic organizer containing choices for how or what students learn (flexibility in the product or process) and can be completed individually or in groups. There are four essential "must-haves" of effective choice boards:

  • Goal-Oriented
  • Structured Choice
  • Engagement
  • Flexibility
1. Goal-Oriented 

Effective choice boards are centered around a learning goal based on one or both of the following:

  • Content - What do you want students to know? (i.e., Analyze and understand the differences between communism and democracy) 
  • Skill - What do you need students to do? (i.e., Demonstrate your understanding of the characteristics of a democratic government) 
This or That-style choice boards are helping students understand the content or demonstrate a skill. For example, the choice board below helps students learn the concept of Volume (concept) and then demonstrate their understanding (skill). 


2. Structured-Choice 

Effective choice boards provide students with structured options, typically between 2 and 9 options. Have you ever been down the cereal aisle with a 5-year-old? It can be a complete nightmare when there are too many options. When we have too much choice, we can become paralyzed and slow to choose. 

Proving structured choice helps avoid this paralysis by analysis while meeting your learning goals. For instance, the following Reading Response choice board provides students with options for summarizing their assigned text. Many of the technology options provide students with suggestions for specific tools to accomplish the task. 
3. Engagement

Effective choice boards increase student engagement by emphasizing that it's NOT the choice but the type of choice that matters! Engaging choice boards provide autonomy, connectedness, and competence (Katz & Assor, 2006). 
  • Autonomy - Do they understand the relevance and meaning? In other words, why is it important to learn it? 
  • Competence - Are they challenged, and can they master the task? Does it provide enough rigor? Is the task too easy or too hard? 
  • Connectedness - Do students feel a sense of belonging and accomplishment? Does the task provide students with an opportunity to create, have significance, or connect with an authentic audience? 

 For example, the following Tic-Tac-Toe-style Vocabulary Choice Board provides students with the autonomy to decide which task they will complete. Each task provides students with an appropriate balance of rigor and relevance while providing students the opportunity to connect with vocabulary in a personalized and meaningful way. 


4. Flexibility

Finally, effective choice boards provide learners with flexibility in the process or product of learning. 

  • Flexibility in the Process provides learners with tools, scaffolds, and supports to accomplish the goal. For instance, if you were having students write a paragraph on the major causes of the American Revolution, you might provide students with different tools to accomplish the task. For example, you might provide students with options for writing the paragraph (i.e., using a graphic organizer, lined paper, and Google Doc template) and editing the writing piece (i.e., another peer, a checklist, Grammarly, etc.). 
  •  Flexibility in the Product (aka differentiation) provides learners with options for demonstrating their knowledge. For example, if you had students demonstrate the major causes of the American Revolution, you might provide students with options to demonstrate their knowledge (i.e., poster, presentation, video, paper, etc.). 


Learning menu-style choice boards are an effective tool for offering both flexibilities in the product and process. The following choice board provides students with a structured choice board to engage, learn, create, and reflect!  

  • Appetizers - This is generally a section where students explore or engage with the topic to get their interest. For example, students may watch a video clip or play a game to "hook" their interest and reflect upon it.


  • Soup and Salad - This is generally a section where students learn something that will prepare them for the main entree! For example, students may research an article, video, or website, which will help them understand and demonstrate their understanding. It may be helpful for students to reflect in this section as they prepare for the entree. 
  • Entree - This is generally a section where students create a product to demonstrate understanding. For example, students may create a presentation or product demonstrating their knowledge of the topic.
  • Dessert - This is generally a section where students reflect on what they have learned. Provide students with different options to reflect through different mediums.
Tip - This is generally a section containing a rubric showcasing expectations and how students will be graded. It may be helpful to have a checklist of expectations for completing the project and an opportunity for students to assess themselves prior to turning in the project.


Conclusion

In conclusion, choice boards are a great way to change the dynamics in your classroom by providing positive options, autonomy, flexibility, increasing engagement, and developing richer learning experiences. However, it is NOT the choice, but the type of choice that matters. We can increase the effectiveness of choice by providing learners with choice boards that are goal-oriented, provide structured choice, emphasize engagement, and offer flexibility in the product or process. 


Using Blendspace to Create Interactive Lessons

Students need options for perceiving and comprehending new information presented to them It is during this time when the brain is primed for using sensory information and different forms of media to make meaning.  Using tools that promote options for representing how content is delivered can be key to learning a new topic. 

What is Blendspace?

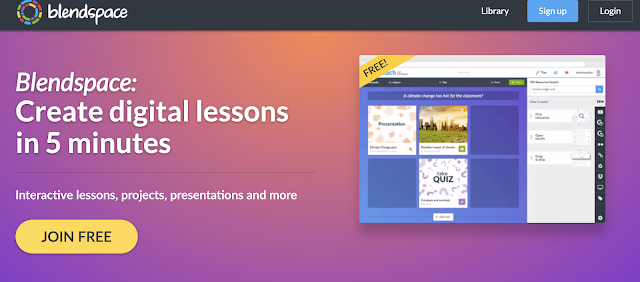
Blendspace is a free tool for creating an interactive lesson through a hub of digital content, resources, and more. Teachers can use this tool in minutes to create content, engage learners, and assess progress. 

Blendspace can be used to add videos, images, text, websites, and even quizzes! It's easy to create and share with students. Plus, it provides teachers with tools to scaffold instruction to meet the needs of ALL students, which is essential for creating personalized and accessible learning. 


How Does it Work? 

Blendspace can be a great resource for customizing learning for students and providing them with helpful options for perceiving and comprehending information. Want to see how it works? 

 Check out my video below: 


Matt Bergman (2021)


New Learn Lead Grow Home!

Hello readers! Happy New Year! It’s hard to believe that 15 years have passed since I launched my Learn Lead Grow blog. As we step into a n...